Photo(s) of the Week: The 7th Air Force Bombing Campaign II

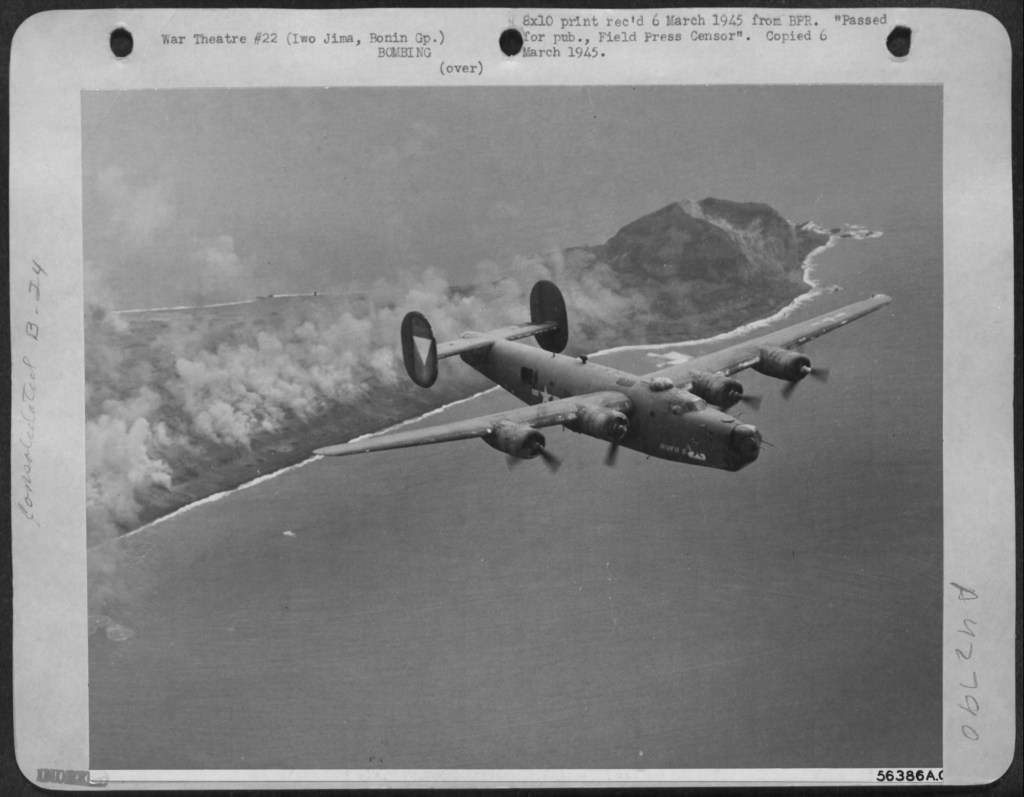
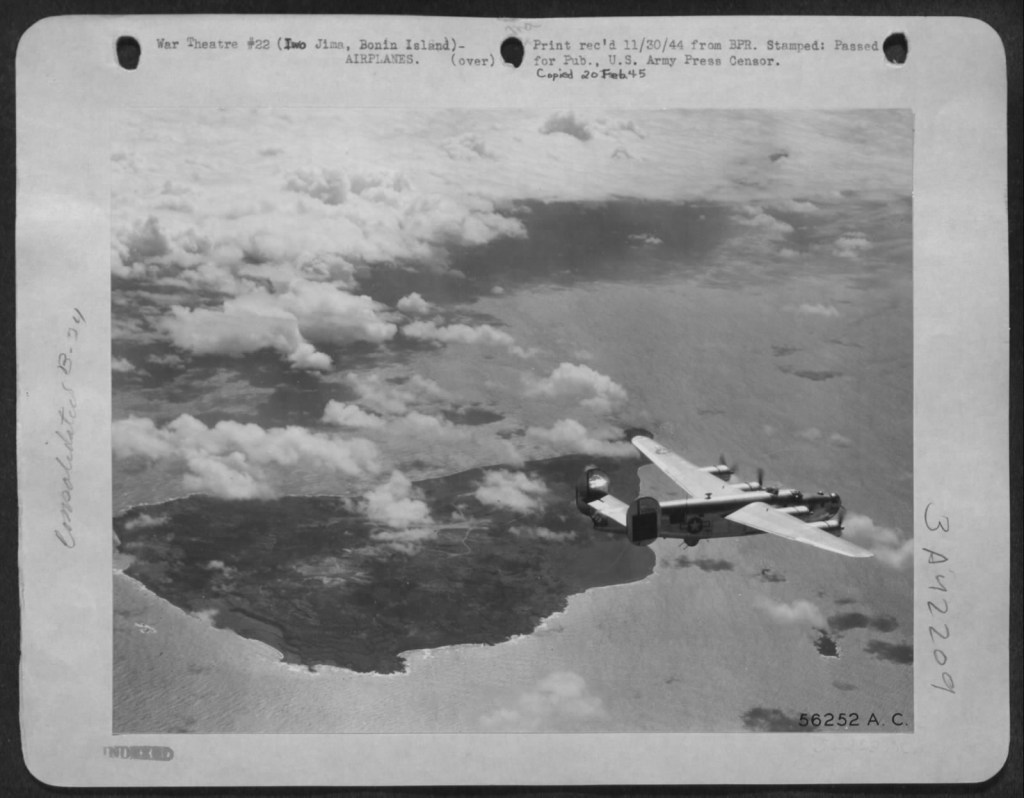
Below are two photos of 819th Bomb Squadron, 30th Bomb Group Consolidated B-24J Liberators heading back for the long trip to the Marianas after bombing Iwo Jima. The 7th Air Force’s Liberators bombed Iwo Jima, Chichi Jima, and Haha Jima on a frequent basis between August 10, 1944, and February 19, 1945.

USAAF/National Archives via Fold3

The official United States Army Air Force caption for the above photo reads: “SOUTH PACIFIC – Bomb scarred Iwo Jima Island only 650 miles from the Japanese homeland is a regular target for the 7th AAF heavies – show clearly the necessity for the famous pin point precision bombing of the 7th AAF Liberators.” No matter how accurate the precision bombing of 7th AAF Liberators was, it would only take a short amount of time for the Japanese troops to repair the damage and return the airfields to operational status, much to the ire of bomber crews.

USAAF/National Archives via Fold3

Notwithstanding, during the period between August 10, 1944 and February 19, 1945, the Japanese air forces on Iwo Jima were greatly disrupted by constant bombardment of 7th AAF Liberators, and never became much of an offensive threat to American air bases in the Marianas.

I am assuming both pictures were taken during the same bombing mission, but there is nothing in the captions for the photos to confirm is assumption.

Photo(s) of the Week; The 7th Air Force Bombing Campaign I

Starting on August 10, 1944, the 7th Air Force B-24 Liberators bombed the airfields and troops on Iwo Jima continuously up to the invasion. The goal was not necessarily to bomb the Japanese forces on Iwo Jima into submission, but to disrupt and neutralize the Japanese ability to strike American airfields in the Marianas from Iwo Jima.

USAAF/National Archives via Fold3

Above is a nice photo of a 392nd Bomb Squadron, 30th Bomb Group Consolidated B-24J Liberator after its bomb run with Mount Suribachi in the background. Note the Japanese use of smoke pots in an attempt to obscure the location of the airfields from the bombers. The photo below shows a 42nd Bomb Squadron, 11th Bomb Group B-24J Liberator on its way back to the Marianas after bombing Iwo Jima.

USAAF/National Archives via Fold3

While the 7th Air Force B-24 crews were very accurate in placing their bombs within the target areas, it did not take very long for the Japanese forces to repair the bomb cratered runaways to get the airfields back in service.

Reference:

Strike and Return: American Air Power and the Fight for Iwo Jima, Cory Graff, Specialty Press (2006)

Photo(s) of the Week; Pre-Invasion Iwo Jima

USAAF/National Archives via Fold3

Above is a nice photo of Iwo Jima taken from the waist window of a 7th Air Force Consolidated B-24J Liberator at the beginning of a bombing raid. I like this photo because it shows the location of Motoyama Airfield #1 (South Field) and Motoyama Airfield #2 (Central Field) on Iwo Jima.

7th Air Force B-24s started bombing Iwo Jima as soon as Saipan was secure and Isley Field was completed. On August 8, 1944, the 30th BG moved from Kwajalein Atoll in the Marshall Islands to Saipan, and two days later flew its first mission to bomb Motoyama Airfield #1. During the month of August, a total of 143 Liberators dropped 290 tons of bombs on Iwo Jima.

The Liberators had to go it alone as 7th Air Force only had Republic P-47D Thunderbolts, which did not have the range to accompany the B-24s on these long range bombing missions from Saipan to Iwo Jima and back. Notwithstanding, the 30th Bomb Group only lost two B-24 during the initial month of August.

References:

Strike and Return: American Air Power and the Fight for Iwo Jima, Cory Graff, Specialty Press (2006)