
Happy New Year to all those who are following this blog! I greatly appreciate your interest not only in the models, but also in the pilots and the history. Best wishes for a productive year with lots of bench time and many completed builds.
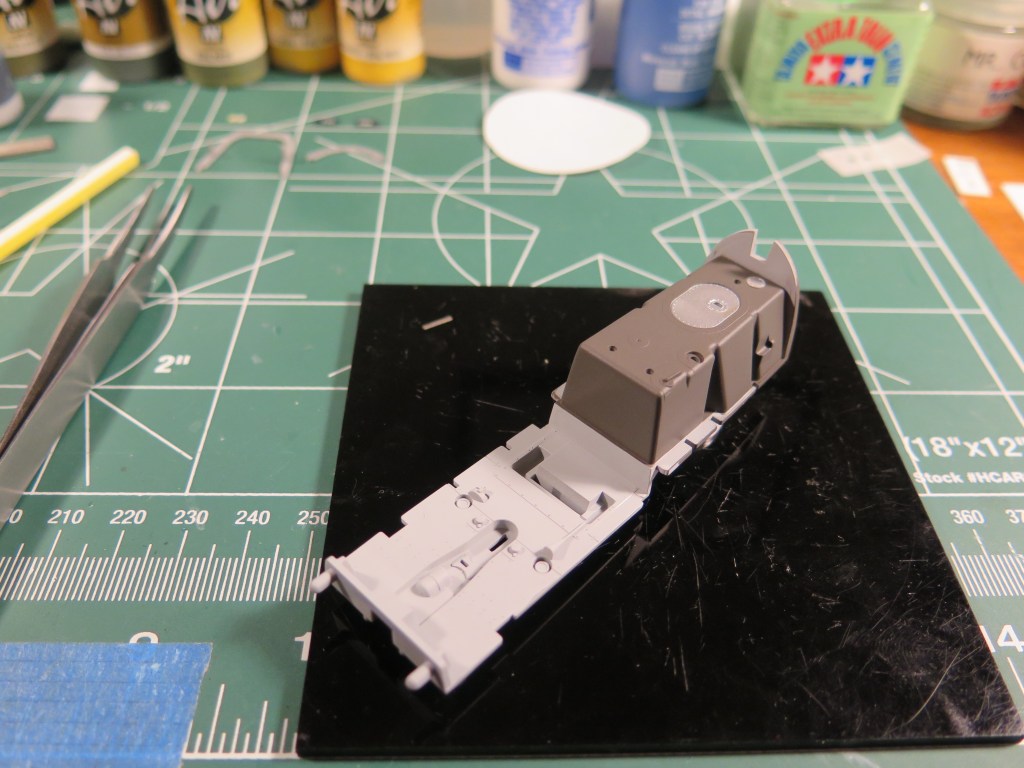
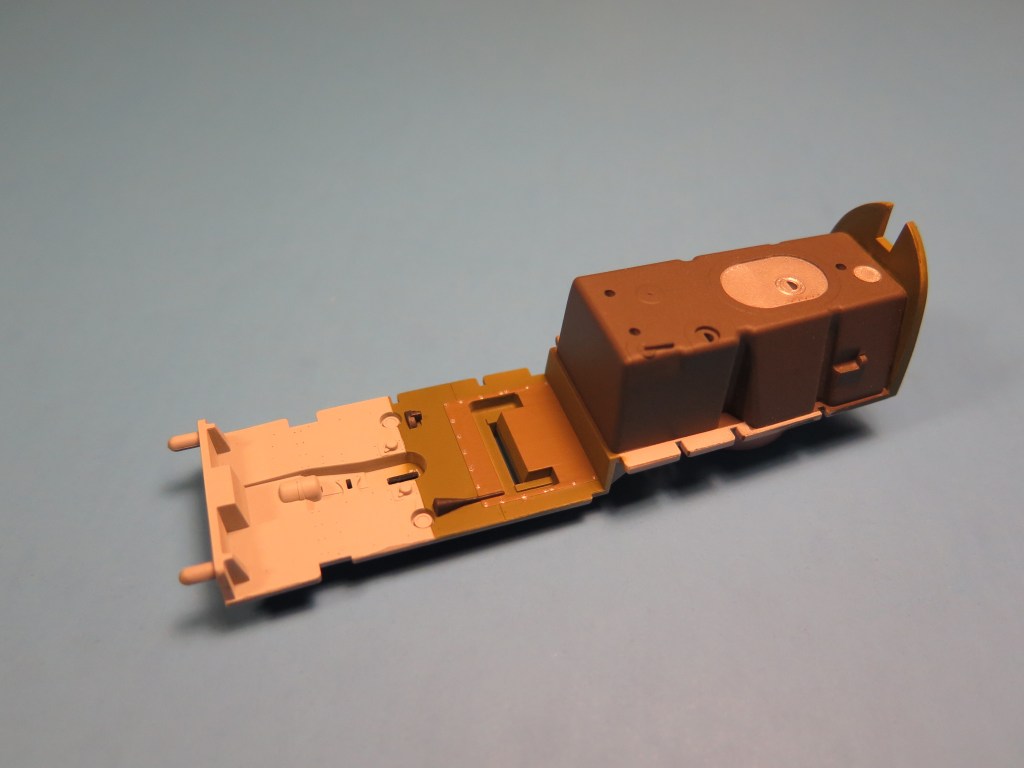
Fuselage Fuel Tank – After spraying the cockpit floor and fuselage fuel tank with Alclad II Grey Primer & Microfiller (ALC 302), I masked off the areas on the top of the tank that were metal and sprayed them Alclad II Aluminum (ALC 101).

The fuselage fuel tank in a Mustang was made of a self-sealing rubber material. Because the actual color of the tank does not look like stark black, I painted it with Vallejo Model Air Tyre Black (71.315). Below is a picture of a P-51D Mustang fuselage tank. I know the tendency is to just paint it black, but several model paint manufacturers make a black rubber color that is very realistic. In addition to Vallejo, the following are some paint manufacturers that make a black rubber color: AK Interactive Acrylic Rubber/Tires (AK720), AK Interactive Real Colors Rubber Black (RC022), Ammo of Mig Jimenez Rubber & Tires (A.MIG-033), Mr. Color Tire Black (C137), and MRP/Mr. Paint Tyre – Rubber (MRP173). So whether you use acrylics, enamels, or lacquers, there is a black rubber tire color out there for you.

I like the look of the black rubber color, and after the cockpit floor is completed, the fuselage fuel tank will be clear coated and weathered for a more realistic look. It was incredibly difficult to keep combat aircraft clean and in a pristine condition, and therefore, building a realistic model of the actual plane requires some weathering. Considering the conditions on Iwo Jima, keeping the sand and grit out of places where it should not be was a constant battle for maintenance crews. As you can see from the two photos below, a tremendous amount of sand/dust/grit was kicked up on takeoffs, let alone when the wind just blew on Iwo Jima. While you cannot see a lot of the fuselage fuel tank when the SCR 522 Radio Transmitter and SCR 695 IFF Transmitter sets are installed and the fuselage halves joined, I still like to be as accurate as possible in capturing a realistic look in the model.


Cockpit Floor – The cockpit floor in the P-51D was plywood for the most part. The front portion was painted with a black anti-skid material, and the back portion (under the seat) was painted Interior Green (ANA 611). In addition, there was a canvas cover underneath the seat that allowed maintenance crews to access control cables after removing the seat. Below is a picture taken from the book North American P-51D Mustang by Robert Peczkowski (Mushroom Model Publications, Yellow Series No. 6126) which shows the colors of the cockpit floor and the canvas cover. Tamiya did a really nice job of adding the canvas cover as detail in their 1/32nd scale kit.

I used Vallejo Model Air Interior Green (71.010) for the back portion of the cockpit floor, and then brushed Vallejo Panzer Aces Canvas (314) for the canvas cover under the seat. The snaps on the canvas cover were colored using a Prismacolor Metallic Silver pencil.
I want to show wear and tear on the front portion of the cockpit floor that would have occurred on the black anti-skid coating from the pilot’s boots working the rudder pedals. I have seen wartime photos in which the anti-skid coating was worn off down the to plywood in front of, under and behind the rudder pedals. To achieve this, the plan is to paint the front portion with Vallejo Model Air Wood (71.077), and then brush on wood grain using Vallejo Model Color Wood Grain (Transparent) (70.828). After that is dry, I will spray on a chipping fluid (MIG Absolute Chipping), and then spray on a lightened black acrylic color to replicate the black anti-skid coating. As soon as the lightened black acrylic paint is dry, I will use a dampened paint brush and start chipping the lightened black acrylic paint away from the areas on the cockpit floor where anti-skid coating would have been worn off. This is known as the “hairspray technique” because hairspray was used as a chipping fluid. I have never tried this technique before. The next build installment will in part cover this attempt.
Rolls Royce Merlin Engine – P-51B/C/D/K Mustangs were powered by a Packard built Rolls Royce Merlin V-12 liquid cooled engine. Tamiya did an excellent job of recreating the Rolls Royce Merlin engine in 1/32 scale. With 47 plastic parts, and 3 photo-etch parts, the engine is a kit itself, and looks fantastic when built up. Attention to the assembly instructions is needed as the sprue that contains the engine parts also contains separate parts for the Rolls Royce Merlin engine for Tamiya’s 1/32 Supermarine Spitfire Mk. IX, and using the wrong parts will cause the engine to not fit properly. Below is a picture of the sub-assemblies and additional parts.
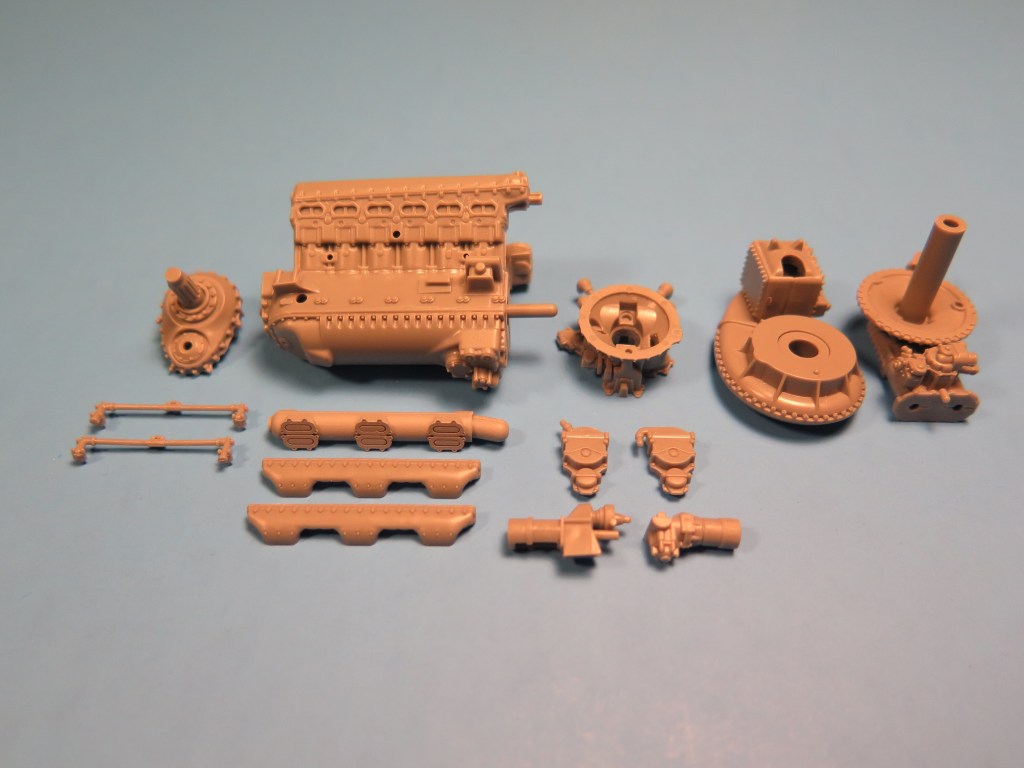
To show how well engineered the kit’s engine is, I assembled the sub-assemblies and added the additional parts without glue. It is amazing how well it comes together.
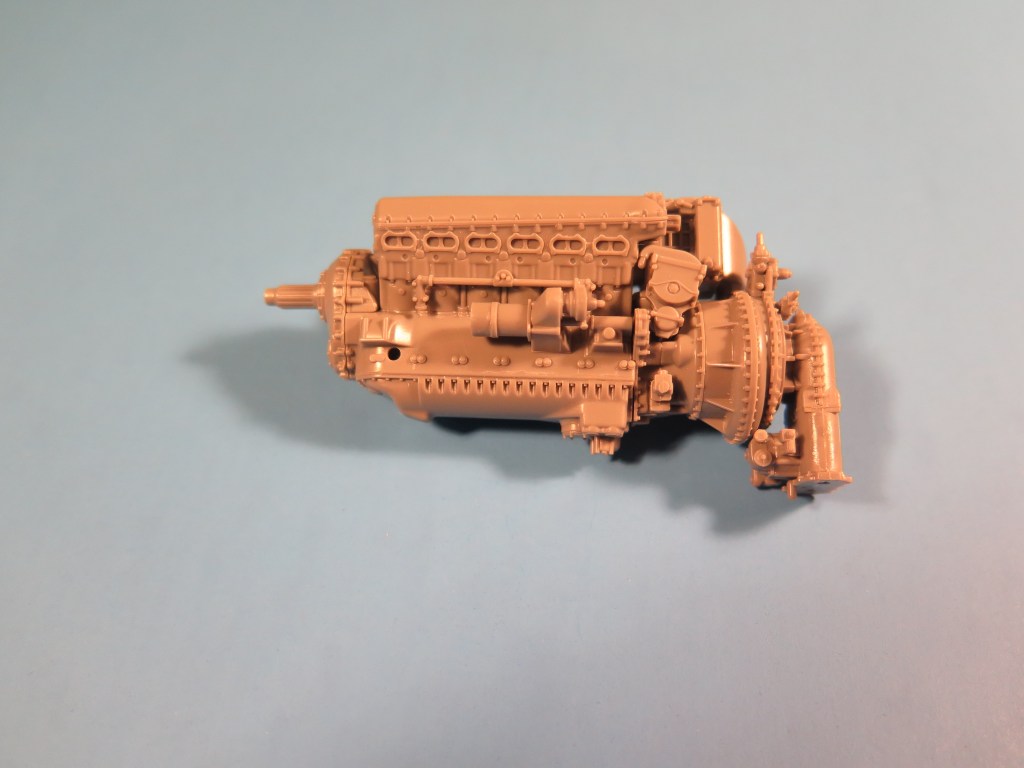
I will paint the various sub-assemblies black and use the Prismacolor Metallic Silver pencil to color all of the exposed nuts, and then finish the final assembly. After a acrylic clear coat, the engine will be weathered to represent use.
If I have any criticism of the engine, there are a few details missing such as the wiring harness coming off of the magnetos, the spark plug wires, and some of the plumbing. Tamiya did provide locating holes for where the spark plugs are located. Below are pictures of the actual engine showing the missing details. The last picture is of the top of a Rolls Royce Merlin engine at the San Diego Air & Space Museum.
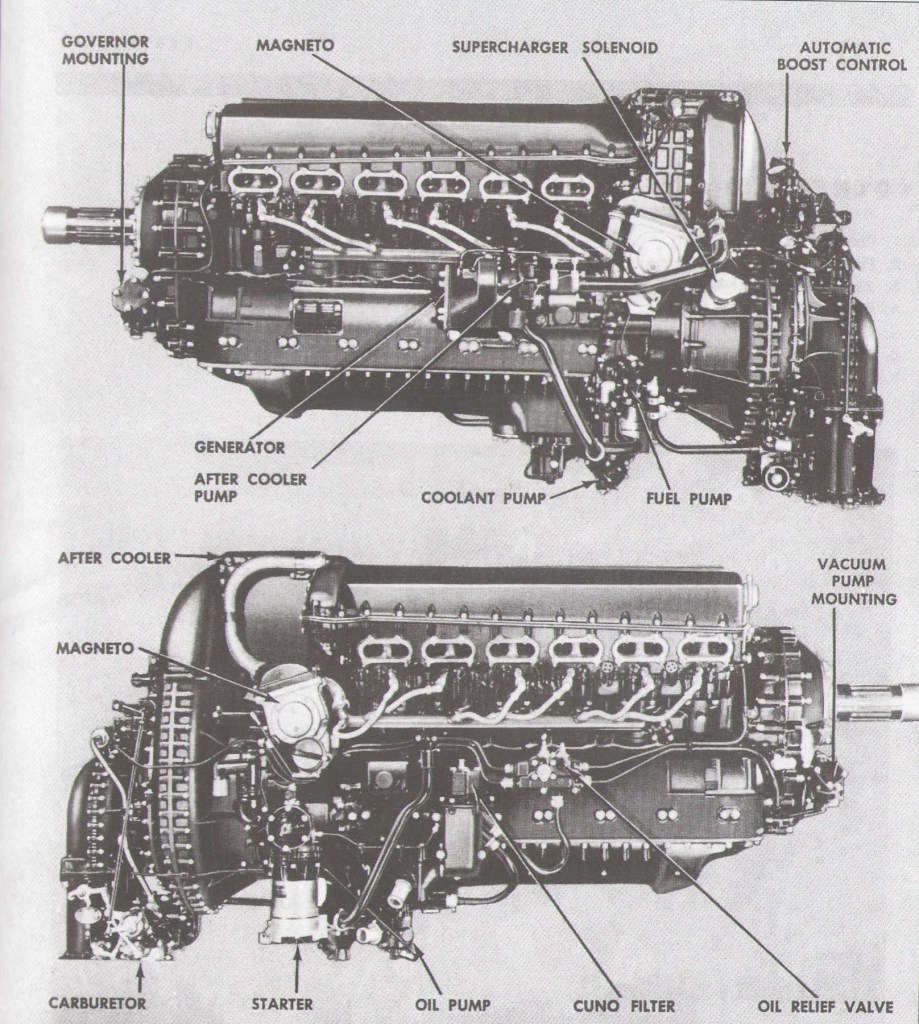
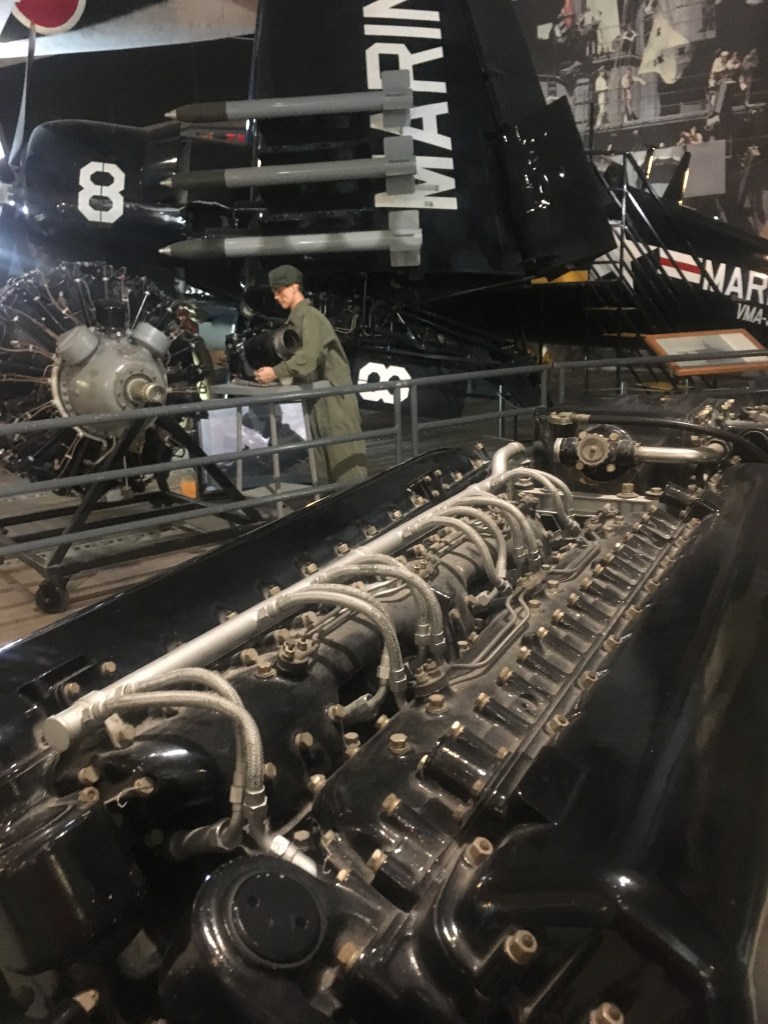
Since the kit’s cowling panels can be removed, I will definitely be adding the wiring harnesses, spark plug wires, and some of plumbing. In the hands of an advanced modeler, the kit’s engine can really be turned into a masterpiece. Kudos to Tamiya!
Next Installment of the Build – Completion of the cockpit floor, final assembly and detailing of the engine, and starting assembly and detailing of the wheel wells. Thanks again for looking in! Comments and criticisms are always welcome.
